My pantry used to be the room I dreaded opening in front of company. Cereal bags stacked sideways, a half-eaten bag of brown sugar with the twist-tie long gone, something that might have been oats or might have been panko. I had done the reorganize-and-reset thing probably four times in as many years. The problem was never motivation. It was that loose packaging cannot hold a system. The second someone grabs a bag and shoves it back, the whole thing unravels. That is when I committed to going fully airtight, and the Rubbermaid Brilliance containers are what finally made it stick.
An airtight pantry system sounds like one of those aspirational projects that requires a free weekend and a label maker you do not own. In reality it takes one afternoon, a clear idea of what you are storing, and the right containers. I am going to walk you through exactly how I set mine up, including the parts most guides skip: how to figure out which sizes to buy before you spend anything, how to sequence the work so you are not living with a wrecked pantry for two days, and how to get your family to actually maintain it once it is done.
Your pantry is one afternoon away from staying organized all week.
The Rubbermaid Brilliance airtight containers are the foundation of this whole system. BPA-free, crystal-clear, and built with a locking lid that keeps flour fresh for months. Check today's price and available sizes on Amazon.
Amazon Check Today's Price on Amazon →Step 1: Empty the Pantry Completely and See What You Actually Have
I know this step sounds obvious, but most people skip it. They buy containers, bring them home, and try to pour things in around the existing mess. That approach creates an organized-looking front row and a chaotic second row you cannot see. You need to pull everything out onto your kitchen table or counter so you can make real decisions.
While everything is out, throw away anything expired, nearly empty, or that no one in the family has touched in six months. This step alone usually clears 20 percent of a pantry. Group what remains into rough categories: breakfast items, baking supplies, grains and pasta, canned goods, snacks, condiments and oils. You are not organizing yet. You are just sorting so you can see the volume you are working with in each category.
Take a photo of the spread on your counter. It sounds silly but it helps enormously when you are shopping for container sizes online. You can look at the photo and say: that is three large pasta bags, two bags of rice, and a half-used bag of quinoa. That cluster tells you exactly how many large containers to buy before you spend a dollar.
Step 2: Measure Your Shelves and Match Them to Container Sizes
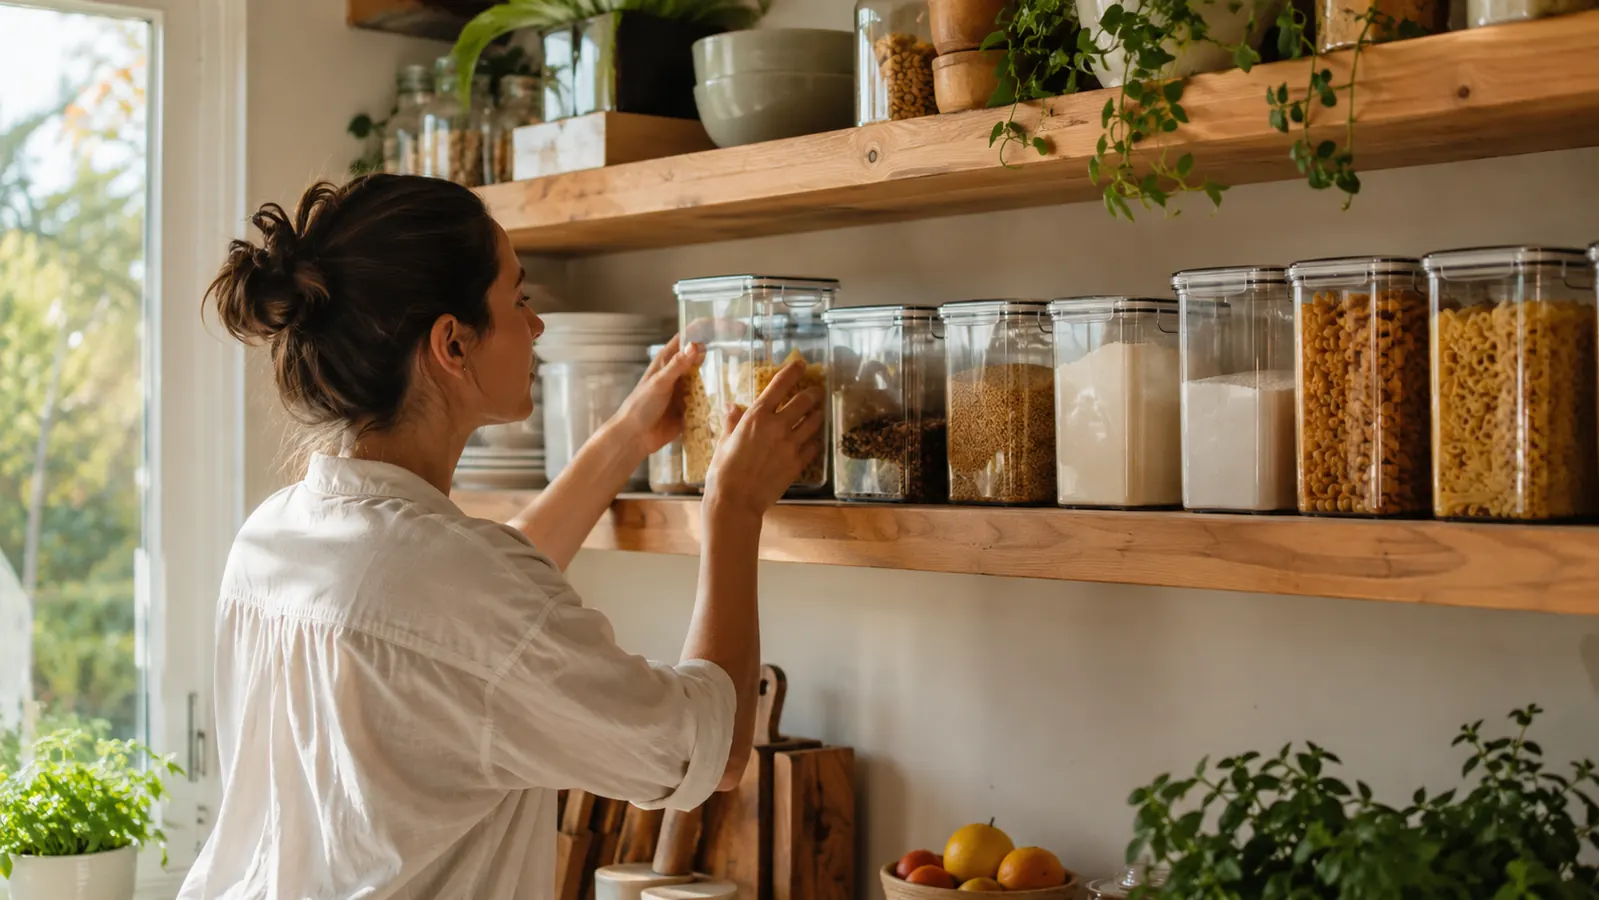
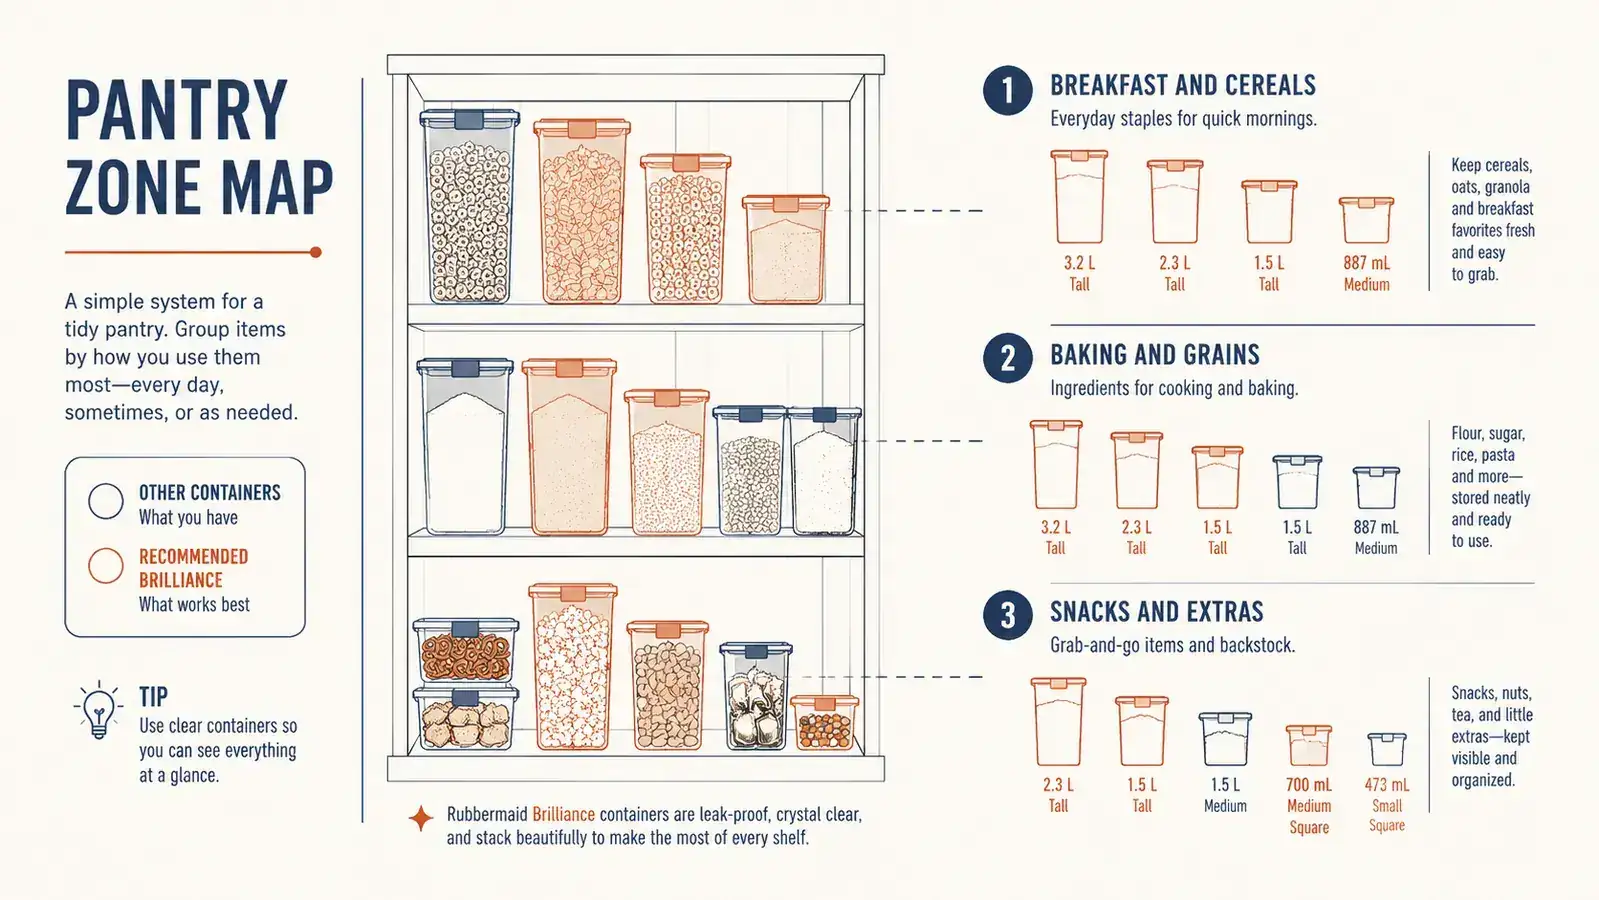
The Rubbermaid Brilliance line comes in several sizes, ranging from small 0.5-cup containers up to 18.5-cup large canisters. The most useful sizes for a family pantry are the 4.7-cup and 9.6-cup containers. The 4.7-cup handles snacks, brown sugar, coffee, and smaller baking staples. The 9.6-cup handles pasta, oats, flour, and cereal. Before you order anything, measure the depth and height clearance of each shelf in your pantry.
Most standard pantry shelves are 11 to 14 inches deep. The Brilliance containers stack cleanly on shelves that deep because they are rectangular rather than round, which means you lose almost no edge space to wasted corners. The clear body means you can see through a whole row without pulling anything forward, which is a bigger quality-of-life improvement than it sounds on paper. My middle shelf holds two rows of 4.7-cup containers deep with room to spare.
Write down your shelf dimensions and the number of shelves you have before you order. A pantry with four shelves of 14-inch depth can typically accommodate 16 to 20 containers in a mix of sizes, which is plenty for most families. If you are working with a smaller pantry, prioritize the categories you touch daily: breakfast grains, snack items, and baking staples. Those are the spots where loose packaging causes the most daily friction.
Step 3: Order the Right Quantity and Wait to Label Until They Arrive
This is the step where most people make an expensive mistake. They order one size across the board and then discover that a family-sized bag of flour does not fit in a 4.7-cup container, or that the 18.5-cup container is enormous for coffee pods. Use your counter photo and shelf measurements together to build a shopping list that mixes sizes deliberately.
For a family of four to five, a practical starter set for an airtight pantry is roughly six 4.7-cup containers, four 9.6-cup containers, and two larger canisters for things like pasta or a bulk grain. The Rubbermaid Brilliance 4-piece set at 4.7 cups is a good anchor purchase because the price per container drops significantly in a set versus buying individually. From there you can add the larger sizes as you identify the specific items that need them.
Do not buy labels until the containers arrive. The Brilliance lids are flat on top, which makes them perfect for round chalk labels or small rectangular printed labels. But the size and placement look different in person than in photos online. Waiting two days to label after your containers arrive means your labels end up in the right place the first time, rather than half-stuck and repositioned.
Step 4: Fill the Containers and Arrange Them by Frequency of Use
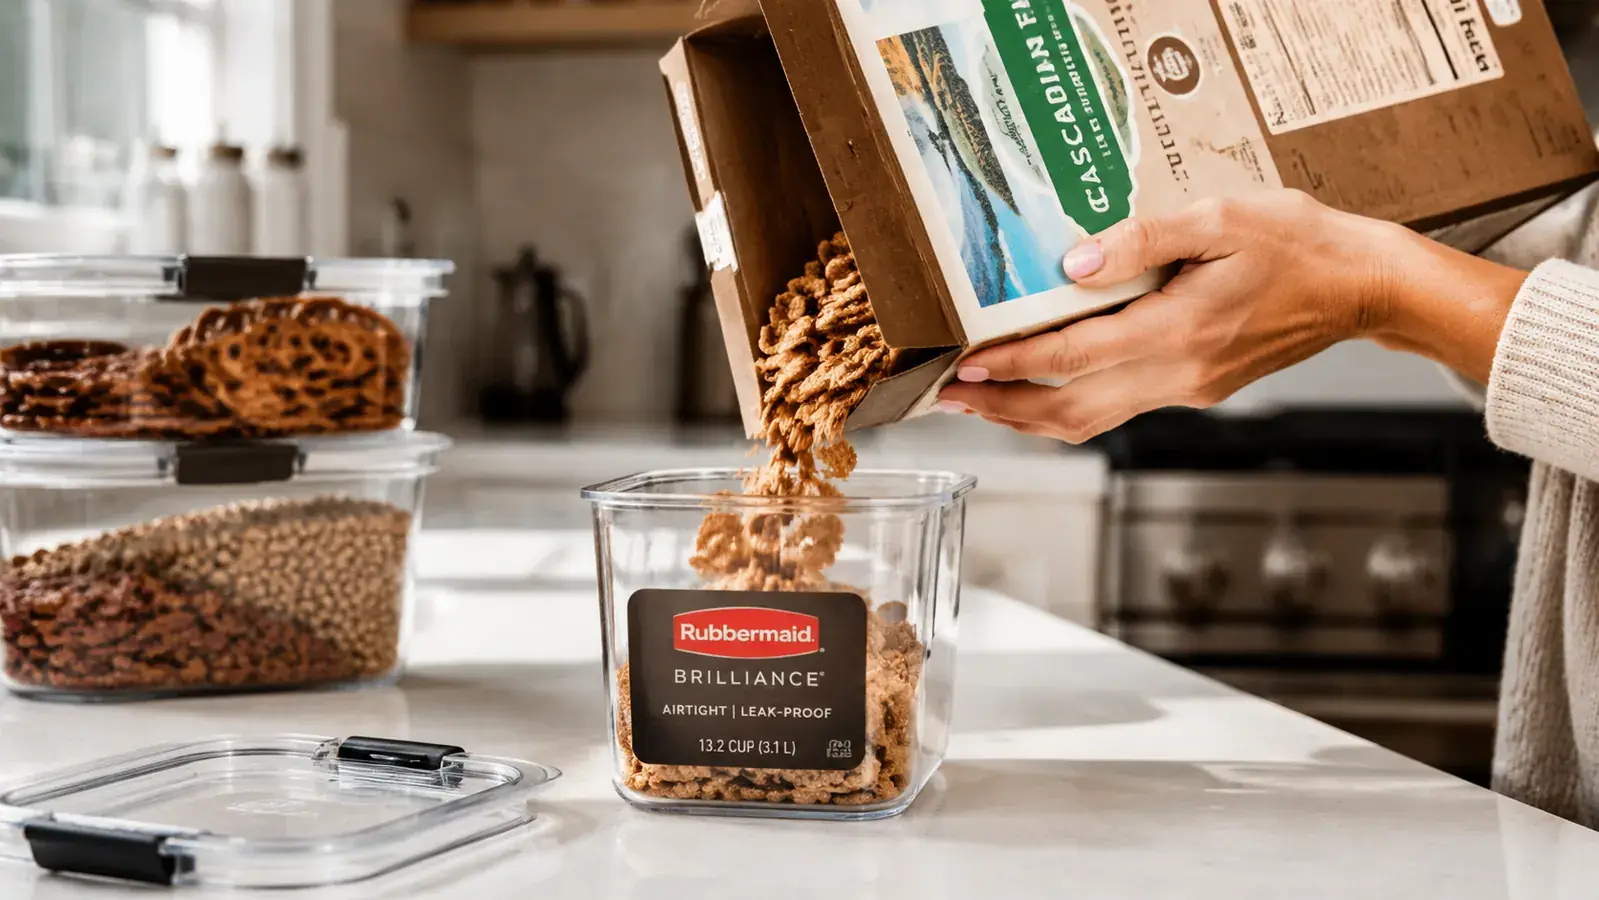
When your containers arrive, transfer your dry goods in one session. Pour straight from the bag into the container, then close the Brilliance lid. You will hear a faint click when all four latches are engaged. That click is the seal working. The lids have a soft gasket around the perimeter that keeps air out without requiring you to press down hard. It takes less force than you expect, which matters when you are teaching kids to close them properly.
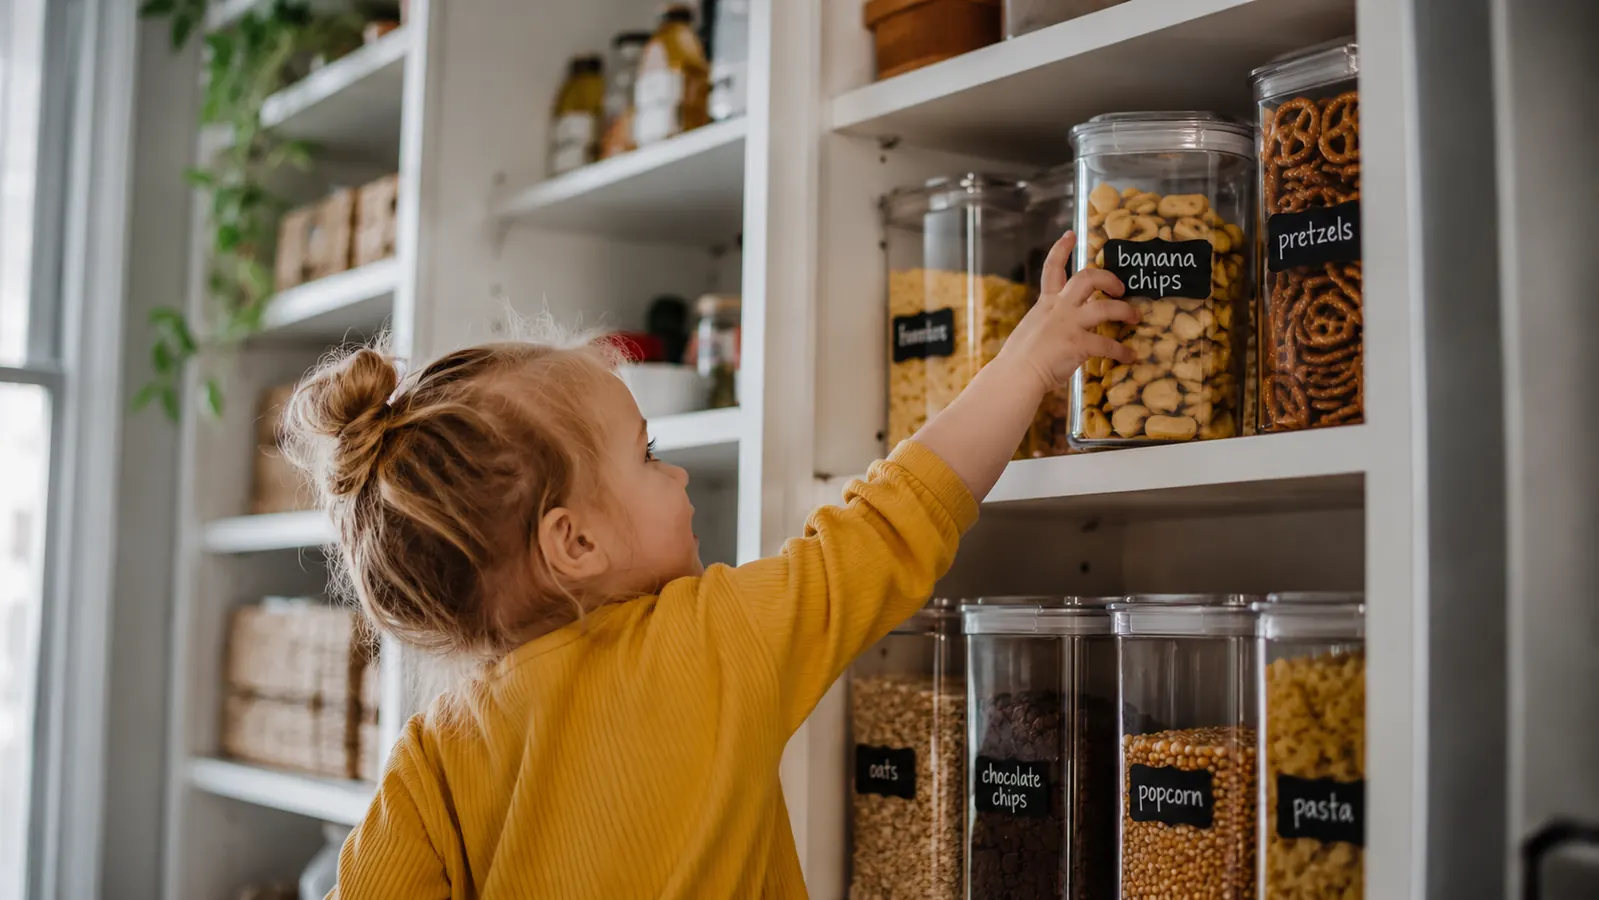
Arrange your filled containers by how often your family reaches for them. Daily-use items go at eye level or on the shelf you reach most naturally. Baking staples that only come out on weekends go on a higher shelf or further back. My snack containers live at my youngest kid's shoulder height on purpose. She can serve herself without asking me, and she can put the container back because it has a specific spot. That small choice has changed how the pantry holds up through the school week.
Group containers loosely by category and leave a couple of inches between groups so that a container being pulled out does not drag neighbors with it. The Brilliance containers have a raised base that grips pantry shelves without sliding, but spacing still helps. A small gap between the snack zone and the baking zone is also a visual cue for kids: snacks live here, not over there.
Step 5: Label Everything and Build a Simple Refill Habit
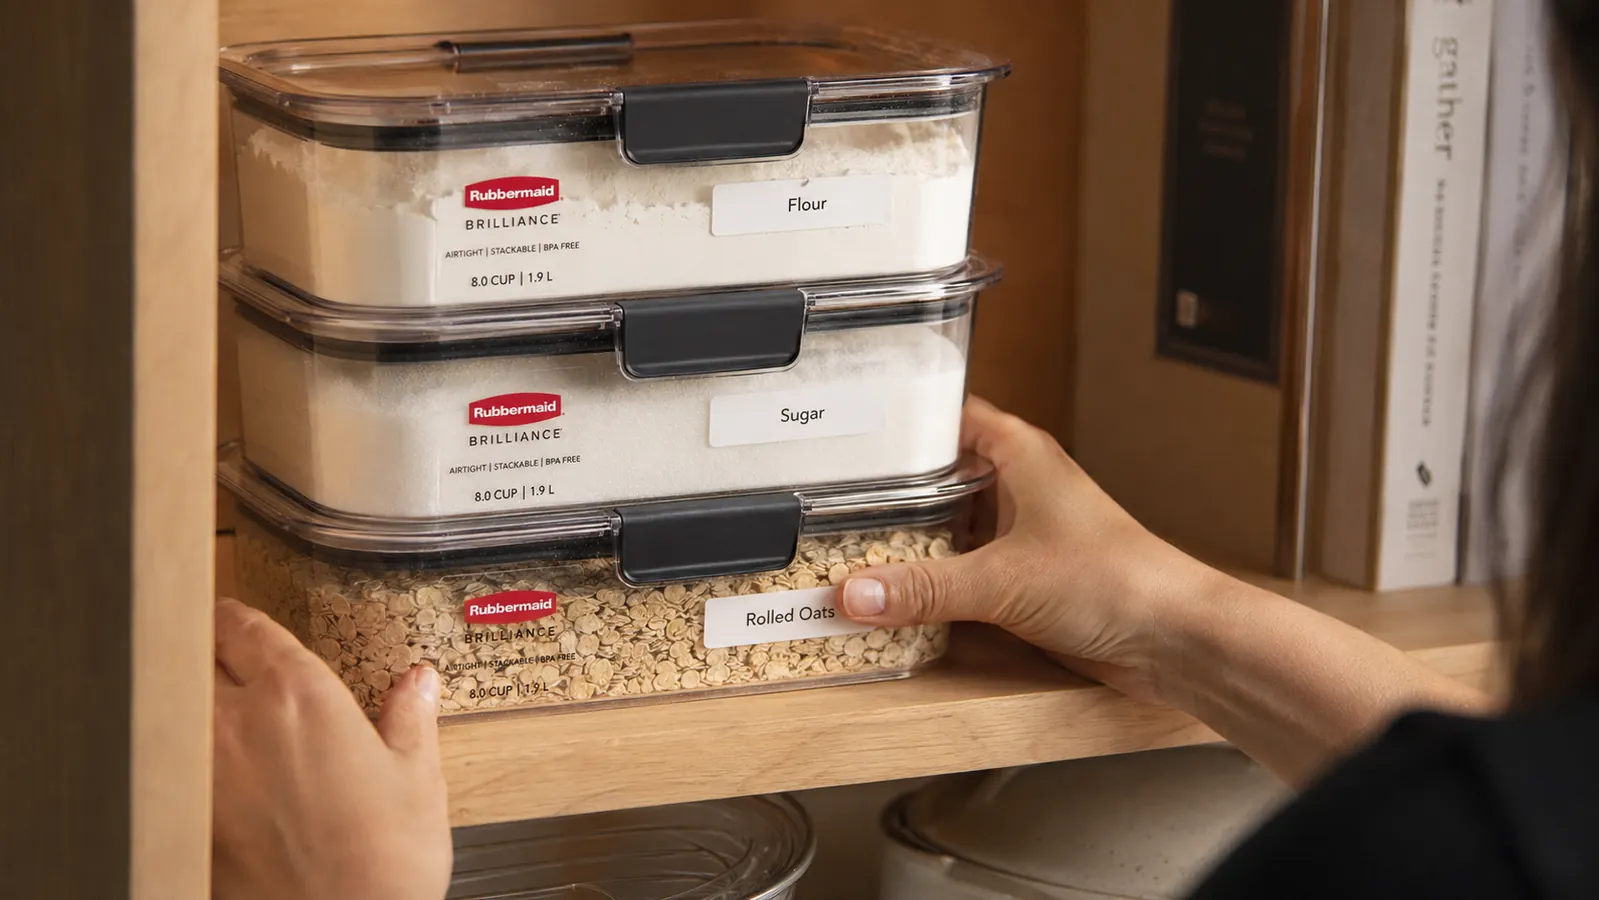
Labels are where a functional system becomes a family-wide system. Anyone who can read can find what they need and put it back correctly. I use a simple printed label with the food name in large text and, for baking items, a secondary line with the expiration date of the batch I poured in. The Brilliance lids are smooth enough that a standard kitchen label or chalk label adheres cleanly and removes without residue.
The refill habit is the part that determines whether your airtight pantry system actually holds up in six months. Mine works like this: when a container hits about one-quarter full, I add the item to my grocery list immediately, rather than waiting until it is empty. When I bring the new bag home, I pour it into the container before the bag ever gets shoved into the pantry. Takes thirty seconds. The alternative is a half-used bag next to a half-full container, which is exactly how pantries slide back into chaos.
When a container hits about one-quarter full, it goes on the grocery list. That thirty-second habit is what keeps the airtight system working three months later, not just three days later.
One more thing worth saying about Rubbermaid Brilliance specifically: the containers are dishwasher safe on the top rack. Twice a year I pull everything out, wash the containers, and start fresh. It takes less than an hour and the pantry looks brand new. Airtight containers that are hard to clean get skipped when they need it, which lets smells and residue build up. Easy cleaning is part of why this system sticks when others have not.
What Else Helps
A set of clear pantry bins on the same shelves handles everything that does not transfer into a container: snack bags, juice boxes, single-serving packets, and anything in a box that is too awkward to decant. I keep a couple of bins on the lower shelves specifically for those miscellaneous items. They corral the loose packaging without eliminating it entirely, which is a realistic middle ground for a family that still buys some pre-packaged food. The combination of airtight containers for dry staples and bins for everything else is what makes a pantry feel genuinely calm rather than just temporarily sorted.
Ready to stop fighting your pantry every morning?
The Rubbermaid Brilliance airtight containers have nearly 59,000 Amazon reviews and a 4.7-star rating. The locking lid, crystal-clear body, and stackable design make them the easiest airtight system to actually maintain in a real family kitchen. Check today's price and pick the size set that fits your shelves.
Amazon Check Today's Price on Amazon →